
A traditional Japanese sweet combining sticky rice with sweet red bean paste. This classic confection is often made for festive occasions and ancestral offerings. Learn the secrets to making perfectly textured ohagi at home!
Ohagi
Difficulty: ★★★☆☆Servings
6
servingsPrep time
45
minutesCooking time
2
hoursOhagi Ingredients
- Rice Mixture
Glutinous rice (2 cups) Substitute: Sweet rice or mochigome
Regular rice (1/2 cup) Substitute: Japanese short-grain rice
Water (Amount for 2.5 cups rice)
- Red Bean Paste
Red beans (250g) Substitute: Azuki beans
Sugar (230g)
Salt (pinch)
- Kinako Coating
Soybean flour (as needed) Substitute: None possible (traditional ingredient)
Sugar (to taste)
Salt (pinch)
Ohagi Directions
- Cook Perfect Rice Blend
Wash 2 cups glutinous rice and 1/2 cup regular rice thoroughly until water runs clear. Combine in rice cooker with water according to manufacturer's instructions for sticky rice. The addition of regular rice prevents the final product from becoming too sticky or gummy when cooled. - Prepare Anko Coating
While rice cooks, prepare the sweet bean paste. For homemade paste, cook 250g pre-soaked azuki beans in plenty of water. Discard water once boiling, refill, and repeat three times to remove bitterness. Simmer beans in fresh water until completely soft when pressed between fingers. - Sweeten Bean Paste
Drain cooked beans, reserving a small amount of cooking liquid. Add 230g sugar in 2-3 additions, allowing each addition to dissolve before adding more. Heat briefly after each addition, but avoid boiling. Allow mixture to cool completely - this crucial step ensures the sugar fully penetrates the beans for even sweetness. - Reduce To Proper Consistency
Return bean mixture to medium heat. Cook, stirring gently to avoid crushing beans, until mixture thickens and liquid is reduced. When a wooden spoon drawn through the mixture leaves a visible path, it's ready. Add a pinch of salt to enhance flavor. Cool completely before using. - Mash Hot Rice
When rice is freshly cooked and still very hot, transfer to a wooden or plastic bowl. Using a wooden pestle or rice paddle, mash the rice using a downward pressing motion. Continue until rice becomes sticky and somewhat smooth, but still maintains some texture - completely smooth mochi is not the goal for ohagi. - Form Base Shapes
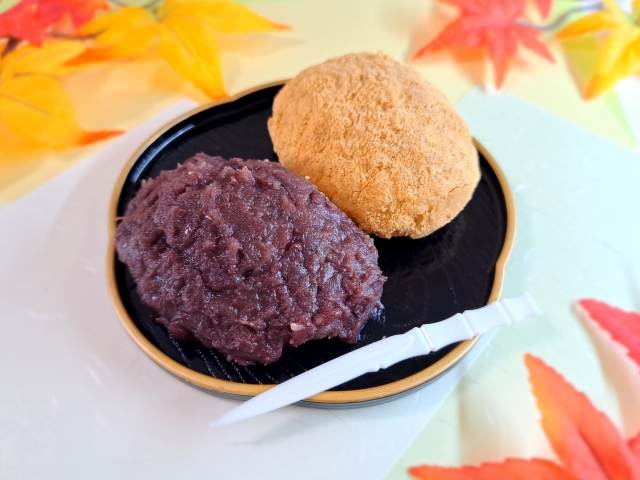
With moistened hands, divide the warm rice into 15-18 equal portions. Shape each portion into a cylinder or oval about 5cm long. Work quickly while rice is warm for easiest handling. The traditional shape is oval, resembling the shape of hagi (bush clover) seeds. - Apply Bean Paste Coating
For each piece, flatten bean paste in your palm, then wrap around the rice cake, leaving a small amount of rice visible at the ends. Alternatively, roll rice directly in a shallow bowl of bean paste. For variety, some pieces can be made smaller and completely encased in bean paste, while others can be rolled in sweetened kinako (soybean flour). - Rest Before Serving
Allow finished ohagi to rest for 15-20 minutes before serving. This resting period allows the flavors to meld and the texture to stabilize. Serve at room temperature for best flavor and texture experience.
Notes
- Tips & Points
Rice Ratio Mix with regular rice prevents hardening.
Bean Preparation Triple-boiling removes bitterness.
Sweetness Development Overnight resting improves flavor.
Texture Balance Handle beans gently to maintain shape.
Storage Keep at room temperature for 1 day. Wrap individually.